Redi-Rail Linear Guides: 4- and 5-Roller Carriage Load Details

Redi-Rail Linear Guides: 4- and 5-Roller Carriage Load Details

Video thumbnail

Linear guide components have seen an expansion in PBC Linear's already popular Redi-Rail® line. Now, all metric Redi-Rail sizes feature 4-wheel and 5-wheel carriage options. These product extensions provide customers with greater design flexibility, higher load ratings, and the potential for significant cost savings.


Regarding increased load capabilities, it is important to understand how the addition of rollers affects load capabilities, and which rollers support the load based on the relative position to the slider assembly. What this means for the customer is, while the load rating can increase significantly when adding rollers, in certain instances the values will not change when going from a 3-roller to 4-roller carriage due to the makeup of loaded and unloaded rollers.

The added flexibility of multiple roller options can save money in designs where a single 4- or 5-roller slider can take the place of two 3-roller sliders. In some cases that savings can approach 25%. Another advantage is that the rail will likely be shorter in most designs due to the reduction in space taken by a single slider as opposed to two sliders.

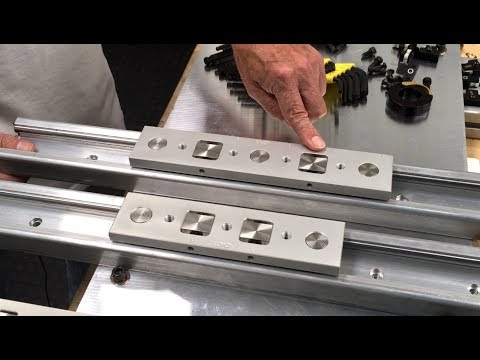
The following offers a visual representation of the different sliders and their load orientation, as well as their subsequent load advantages over a 3-roller carriage. This advantage is designated by the ratio number. Please reference the slider orientation diagram (Fig 1). For more detailed information on load capacities download the CRT Product Catalog to find specifications on all Redi-Rail products.

Radial Loading (FY)

3-Roller Carriage
2 radially loaded rollers

4-Roller Carriage
2 radially loaded rollers
1:1 ratio with 3-roller carriage

5-Roller Carriage
3 radially loaded rollers
3:2 ratio with 3-roller carriage

FZ - Axial Loading

Axial Loading (FZ)

3-Roller Carriage
3 axially loaded rollers

4-Roller Carriage
4 axially loaded rollers
4:3 ratio with 3-roller carriage

5-Roller Carriage
5 axially loaded rollers
5:3 ratio with 3-roller carriage


Pitch Moment Loading

Pitch Moment Loading (MY)

3-Roller Carriage
2 axially loaded rollers

4-Roller Carriage
4 axially loaded rollers
2:1 ratio with 3-roller carriage

5-Roller Carriage
4 axially loaded rollers
2:1 ratio with 3-roller carriage

Yaw Moment Loading

Yaw Moment Loading (MZ)

3-Roller Carriage
2 radially loaded rollers

4-Roller Carriage
2 radially loaded rollers
1:1 ratio with 3-roller carriage

5-Roller Carriage
2 radially loaded rollers
1:1 ratio with 3-roller carriage

MX - Roll Moment Loading

Roll Moment Loading (MX)*

3-Roller Carriage
3 axially loaded rollers

4-Roller Carriage
4 axially loaded rollers
4:3 ratio with 3-roller carriage

5-Roller Carriage
5 axially loaded rollers
5:3 ratio with 3-roller carriage

*The Mx Roll moment is calculated based on the assumed axis for the moment (pivot axis) is along the center of the carriage. The moment is then supported on one side of the carriage reducing the capacity by ½ based on the normal orientation of the slider.

Pitch Moment Loading

Pitch Moment Loading (MY)

3-Roller Carriage
2 axially loaded rollers

4-Roller Carriage
4 axially loaded rollers
2:1 ratio with 3-roller carriage

5-Roller Carriage
4 axially loaded rollers
2:1 ratio with 3-roller carriage

Yaw Moment Loading

Yaw Moment Loading (MZ)

3-Roller Carriage
2 radially loaded rollers

4-Roller Carriage
2 radially loaded rollers
1:1 ratio with 3-roller carriage

5-Roller Carriage
2 radially loaded rollers
1:1 ratio with 3-roller carriage